NXR Sperm Cryopreservation Protocol (X. laevis)
(Testes Extraction)
1. Euthanize a ♂X. laevis following IACUC standards.
2. Once euthanasia is complete, proceed with the ventral side of the animal exposed on a tray or surface suitable for dissection.
3. Using delicate dissecting scissors, cut an opening through each layer of skin, and pull back to expose the body cavity.
As testes extraction is a terminal procedure, care does not need to be taken to minimize damage from dissection.
4. Testes are located centrally in the abdominal cavity attached to the mesorchium.
5. Using delicate dissecting scissors and forceps, isolate testes from surrounding tissue.
6. Remove testes from the abdominal cavity and trim off any excess tissue still connected to the testes.
7. Roll testes across a paper towel to remove any remaining connective tissue or blood before storing testes in a Petri dish filled with pre-chilled 1.2x MMR on ice.
Optionally, using the flat side of dissecting forceps, apply light pressure to each testis and run forceps down each side to break apart surface level blood vessels.
8. Testes can then be stored at 4°C for at least 1 week.
Once extracted, testes should be kept cold through the entire process of assessment and freezing.
(Quality Assessment)
(Homogenize Testes)
9. Remove dish with testes from 4°C storage and place on ice.
10. Prepare conical bottom 1.5mL tube(s) on ice with enough chilled 1.2x MMR to submerge testes (~100-300μL each).
Intact or homogenized testes should be kept on ice or at 4°C until freezing.
11. Homogenize testes using a micro pestle until tissue is broken apart. Testes can also be torn into small pieces with forceps instead.
Once homogenized, samples can be pipetted into a different tube to separate out the largest chunks of tissue. This can streamline sample filling later as the largest remaining pieces of tissue can clog pipette tips or 0.25mL French straws. Alternatively, a cell-strainer could be used for the same purpose.
(Concentration)
12. Prepare a microscope with 20/40x phase contrast objective(s).
Total magnification with eyepieces (10x) is 200x/400x.
13. Prepare a hemocytometer chamber with cover slip and place under the microscope.
Examine the chamber with a 10/20x phase contrast objective to ensure the chamber is clean prior to adding a sample.
14. Prepare a 1.5mL tube and dilute the homogenized sample 1:200 with 1.2x MMR.
1:200 is a reliable initial dilution that can be modified later. Flick the sample tube several times prior to drawing up 1μL to ensure homogeneity.
15. Pipette 10μL of the dilute sample into the hemocytometer chamber under the cover slip.
Capillary action will cause the sample to be pulled into the chamber.
16. Focus the microscope on the grid and perform a count of sperm present.
Perform a count of sperm with a partial or whole count of the grids. Follow manufacturer recommendations for counting techniques and to determine an appropriate number of cells to count. Refer to hemocytometer instructions for calculations.
17. Variation of sperm concentration is normal and expected due to a variety of factors.
A range of 200-600 × 106 sperm/mL is expected from a healthy 1+ year old X. laevis. Higher and lower concentrations have been recorded, appearing to relate to overall health and age of the X. laevis.
(Viability – Membrane Integrity)
18. Using the concentration calculated above, dilute 1μL of sample with 1.2x MMR to reach a concentration of approximately 12.5 × 10⁶ – 20.0 × 10⁶ sperm/mL. Then add 0.4% Eosin Y 1:1 with the dilute sample.
Exact dilution is not critical, it is only necessary to have a suitable number of sperm present to count.
19. Pipette the stained sample onto a standard microscope slide and apply a cover slip.
Exact volume is dependent on the size of the cover slip (5-10μL).
20. Using 20/40x objectives with brightfield function, focus on sperm.
21. Record the number of stained and unstained sperm present, making sure to view multiple parts of the slide.
After 1+ minutes the stain will begin to draw into the nonviable sperm. Sperm with any amount of stain observed should be considered stained. Counting an exact number is not necessary, so count enough to be representative of the sample. Between 200-250 should be suitable. A range of 50-60% viable (unstained) sperm is acceptable, while a range of 60-70%+ is good.
(Motility)
22. Motility can be assessed visually through a microscope, recorded with a camera and assessed later, or assessed with Computer-Assisted Sperm Analysis (CASA) software.
23. Xenopus sperm is activated and becomes motile when exposed to a hypotonic environment. An osmotic pressure of <50mOsm/kg is suitable to reliably excite X. laevis sperm.
Below are relevant osmolality values:
- 1.2x MMR – 250mOsm/kg
- 1x MMR – 200mOsm/kg
- 0.1x MMR – 20mOsm/kg
- DI H2O ~ 0mOsm/kg
24. Prepare a microscope using either 10x or 20x objectives for 100-200x total magnification.
25. Prepare a chamber suitable for the chosen method of motility analysis.
Different CASA software packages may rely on specific chambers with a set volume or depth, so refer to manufacturer recommendations. Without the use of CASA software, a variety of chambers would be suitable for visual assessment.
26. Using the concentration calculated previously, dilute 1μL of sample with 1.2x MMR to reach a concentration of approximately 25.0 × 10⁶ – 50.0 × 10⁶ sperm/mL.
27. Using either DI H2O or 0.1x MMR, dilute the sample to <50mOsm/kg.
28. Take a 3μL sample (or a sufficient amount) and apply to chamber.
29. Immediately begin assessing sperm motility.
X. laevis sperm exhibits a half-life of ~2 minutes, so delay to counting can result in an inaccurate picture of the sample. Motility can be broadly categorized into progressively motile, non-progressively motile, and immotile. A total motility of 35-40% total motile sperm is expected from homogenized X. laevis testes prior to a freeze-thaw cycle.
(Freezing)
30. Determine the number of samples to produce based on the quality assessment.
- A final amount of sperm between 6.25 × 10⁶ – 12.5 × 10⁶ is sufficient to fertilize 300-500+ eggs.
- Using 125μL sample volumes (vials/tubes) this is a final concentration of 50.0 × 10⁶ – 100.0 × 10⁶ sperm/mL per sample.
- Using 250μL sample volumes (French straws) this is a final concentration of 25.0 × 10⁶ – 50.0 × 10⁶ sperm/mL per sample.
31. Label a sufficient number of tubes, vials, or French straws with detailed information about the sample.
Skip to step 36 if samples are being frozen without the use of a controlled-rate freezer.
32. Fill a polystyrene container or LN2 transport vessel with enough LN2 to hold samples once freezing concludes.
This step can be performed once the freeze cycle has started if multiple LN2 supply tanks are available.
33. Connect the controlled-rate freezer hose to a LN2 supply tank.
34. Turn on and ensure proper operation of the controlled-rate freezer. Program or select the freeze cycle to be used for samples.
- 10 minutes hold at 4°C.
- -20°C/min ramp to -80°C.
- 5 minutes hold at -80°C.
35. Begin the freeze cycle with the controlled-rate freezer.
36. Dilute the sample with 1.2x MMR to 2x the desired final concentration for samples.
Cryoprotectant will be added 1:1 with the sample to reach the final sperm concentration.
37. Add chilled 20% DMF (in 1.2x MMR) 1:1 with the sample to reach the final sperm and cryoprotectant concentration.
Adding cryoprotectant to the sample dropwise and continuously mixing may avoid overexposure of sperm to higher concentrations of the cryoprotectant.
To freeze samples using vials or tubes proceed with steps 38-46.
To freeze samples using French straws proceed with steps 47-58.
To freeze samples without a controlled-rate freezer proceed from step 59.
(Vials)
38. Aliquot the sample across the labeled tubes or vials and replace the caps.
Flick the sample tube to ensure sample is homogenous prior to aliquoting.
39. Load samples onto a rack suitable to freeze to -80°C.
Placing the rack on ice or in a climate-controlled environment (~4°C) will help protect the samples until loading.
40. When the controlled-rate freezer has reached the starting temperature, load the freezer rack, and begin the freeze cycle.
41. Place the prepared container of LN2 near the freezer and wait for the cycle to finish.
42. When the freezing cycle has concluded, quickly move the samples from the freezer into the waiting LN2.
43. Remove a box from a dewar to store samples.
Moving rapidly or submerging the freezer box in a layer of LN2 will ensure samples do not degrade due to exposure to air temperatures.
44. Move samples into the freezer box and store in the dewar.
45. Record the location of the stored samples.
46. Test the samples to ensure quality matches expectations.
(French Straws)
47. Using the modified syringe, slowly pull 250μL from the sample into the straw.
Flick the sample tube to ensure sample is homogenous prior to straw filling. Draw the sample through the straw until it almost reaches the cotton wick. Remove the open end of the straw from the sample tube. Then pull further so the sample wets and seals the middle layer containing polyvinyl alcohol (PVA) powder. This will leave a ~3-5mm gap at the open end of the straw.
48. Wipe down the exterior of the straw with a Kimwipe.
49. Using an ultrasonic sealer, seal the open end of the straw.
Seal with PVA powder or heat-sealing if ultrasonic sealing is not available.
50. Load onto a freezer rack and repeat until all straws are filled.
Placing the rack on ice or in a climate-controlled environment (~4°C) will help protect the samples until loading.
51. When the controlled-rate freezer has reached the starting temperature, load the freezer rack and begin the freeze cycle.
52. Place the prepared container of LN2 near the freezer and wait for the cycle to finish.
53. When the freezing cycle has concluded, quickly move the samples from the freezer into the waiting LN2.
54. Remove a single petal (visotube section) from a daisy goblet in a dewar equipped with canisters. Move the petal to the container holding the straws.
55. Load straws into the daisy goblet petal while submerged to avoid exposing the straws to air temperature.
56. Move the petal with samples back into the daisy goblet in the dewar.
Ensure the petal is filled with LN2 before moving it so the straws are never exposed to air temperature.
57. Record the location of the stored samples.
58. Test the samples to ensure quality matches expectations.
Positional Cooling Platform Devices
Without the use of a controlled-rate freezer to produce an optimized cooling rate, it is still possible to cryopreserve samples with a high degree of success. Using Positional Cooling Platform Devices (PCPDs), it is possible to obtain standardized rates of cooling adjusted by increasing or decreasing the distance of samples from LN2 or LN2 vapor. Two low-cost methods designed by the Aquatic Germplasm and Genetic Resources Center (AGGRC) are detailed. The CryoKit and CryoArk float samples at variable heights above LN2 to produce a range of cooling rates. The Cajun Ejector holds French straws in the neck of a vapor shipper to freeze samples in LN2 vapor.
https://3d.nih.gov/entries/3DPX-021506
(Freezing)(CryoKit)(CryoArk)
(Vials)
59. Adjust the CryoKit or CryoArk to the height necessary to produce the desired cooling rate.
60. Add 5-10cm of LN2 to a polystyrene box of sufficient size to hold the CryoKit or CryoArk.
61. Aliquot the sample across the labeled tubes or vials and replace the caps.
Flick the sample tube to ensure sample is homogenous prior to aliquoting.
62. Load samples onto the CryoKit or CryoArk rack.
Placing the rack on ice or in a climate-controlled environment (~4°C) will help protect the samples until loading.
63. When all samples have been filled, place the rack onto the floating platform, and move the device into the prepared container of LN2.
64. Begin a timer for the duration of time it will take the samples to reach -80°C and hold for an additional 5-10 minutes.
65. Once samples have been frozen, quickly move the samples from the rack into the waiting LN2.
66. Remove a box from a dewar to store samples.
Moving rapidly or submerging the freezer box in a layer of LN2 will ensure samples do not degrade due to exposure to air temperatures.
67. Move samples into the freezer box and store in the dewar.
68. Record the location of the stored samples.
69. Test the samples to ensure quality matches expectations.
(Straws)
70. Adjust the CryoKit or CryoArk to the height necessary to produce the desired cooling rate.
71. Add 5-10cm of LN2 to a polystyrene box of sufficient size to hold the CryoKit or CryoArk.
72. Using the modified syringe, pull 250μL from the sample into the straw.
Flick the sample tube to ensure sample is homogenous prior to straw filling. Draw the sample through the straw until it almost reaches the cotton wick. Remove the open end of the straw from the sample tube. Then pull further so the sample wets and seals the middle layer containing polyvinyl alcohol (PVA) powder. This will leave a ~3-5mm gap at the open end of the straw.
73. Wipe down the exterior of the straw with a Kimwipe.
74. Using an ultrasonic sealer, seal the open end of the straw.
Seal with PVA powder or heat-sealing if ultrasonic sealing is not available.
75. Load samples onto the CryoKit or CryoArk rack and repeat until all straws are filled.
Placing the rack on ice or in a climate-controlled environment (~4°C) will help protect the samples until loading.
76. When all samples have been filled, place the rack onto the floating platform and move the device into the prepared container of LN2.
77. Begin a timer for the duration of time it will take the samples to reach -80°C and hold for an additional 5-10 minutes.
78. Once samples have been frozen, quickly move the samples from the rack into the waiting LN2.
79. Remove a single petal (visotube section) from a daisy goblet in a dewar equipped with canisters. Move the petal to the container holding the straws.
80. Load straws into the daisy goblet petal while submerged to avoid exposing the straws to air temperature.
81. Move the petal with samples back into the daisy goblet in the dewar.
Ensure the petal is filled with LN2 before moving it so the straws are never exposed to air temperature.
82. Record the location of the stored samples.
83. Test the samples to ensure quality matches expectations.
(Freezing)(Cajun Ejector)
(Straws)
84. Prepare a BL-7 vapor shipper by charging it with LN2 in advance and dumping excess LN2 immediately prior to sample freezing.
85. Fill a polystyrene container or LN2 transport vessel with enough LN2 to hold samples once freezing concludes.
86. Using the modified syringe, pull 250μL from the sample into the straw.
Flick the sample tube to ensure sample is homogenous prior to straw filling. Draw the sample through the straw until it almost reaches the cotton wick. Remove the open end of the straw from the sample tube. Then pull further so the sample wets and seals the middle layer containing polyvinyl alcohol (PVA) powder. This will leave a ~3-5mm gap at the open end of the straw.
87. Wipe down the exterior of the straw with a Kimwipe.
88. Using an ultrasonic sealer, seal the open end of the straw.
Seal with PVA powder or heat-sealing if ultrasonic sealing is not available.
89. Load the sealed French straws into the holder section of the Cajun Ejector, held by the end with the cotton wick.
90. Position the Cajun Ejector in the neck of the vapor shipper.
91. Begin a timer for the duration of time it will take for the samples to reach -80C.
A thermocouple can be used to record the temperature rather than estimating based on published cooling rates.
92. Once samples reach -80C, depress the plunger of the Cajun Ejector to release the samples into the basket below.
93. Once samples have been frozen, quickly move the samples from the rack into the waiting LN2.
94. Remove a single petal (visotube section) from a daisy goblet in a dewar equipped with canisters. Move the petal to the container holding the straws.
95. Load straws into the daisy goblet petal while submerged to avoid exposing the straws to air temperature.
96. Move the petal with samples back into the daisy goblet in the dewar.
Ensure the petal is filled with LN2 before moving it so the straws are never exposed to air temperature.
97. Record the location of the stored samples.
98. Test the samples to ensure quality matches expectations.
Addendum – Tools and Consumables

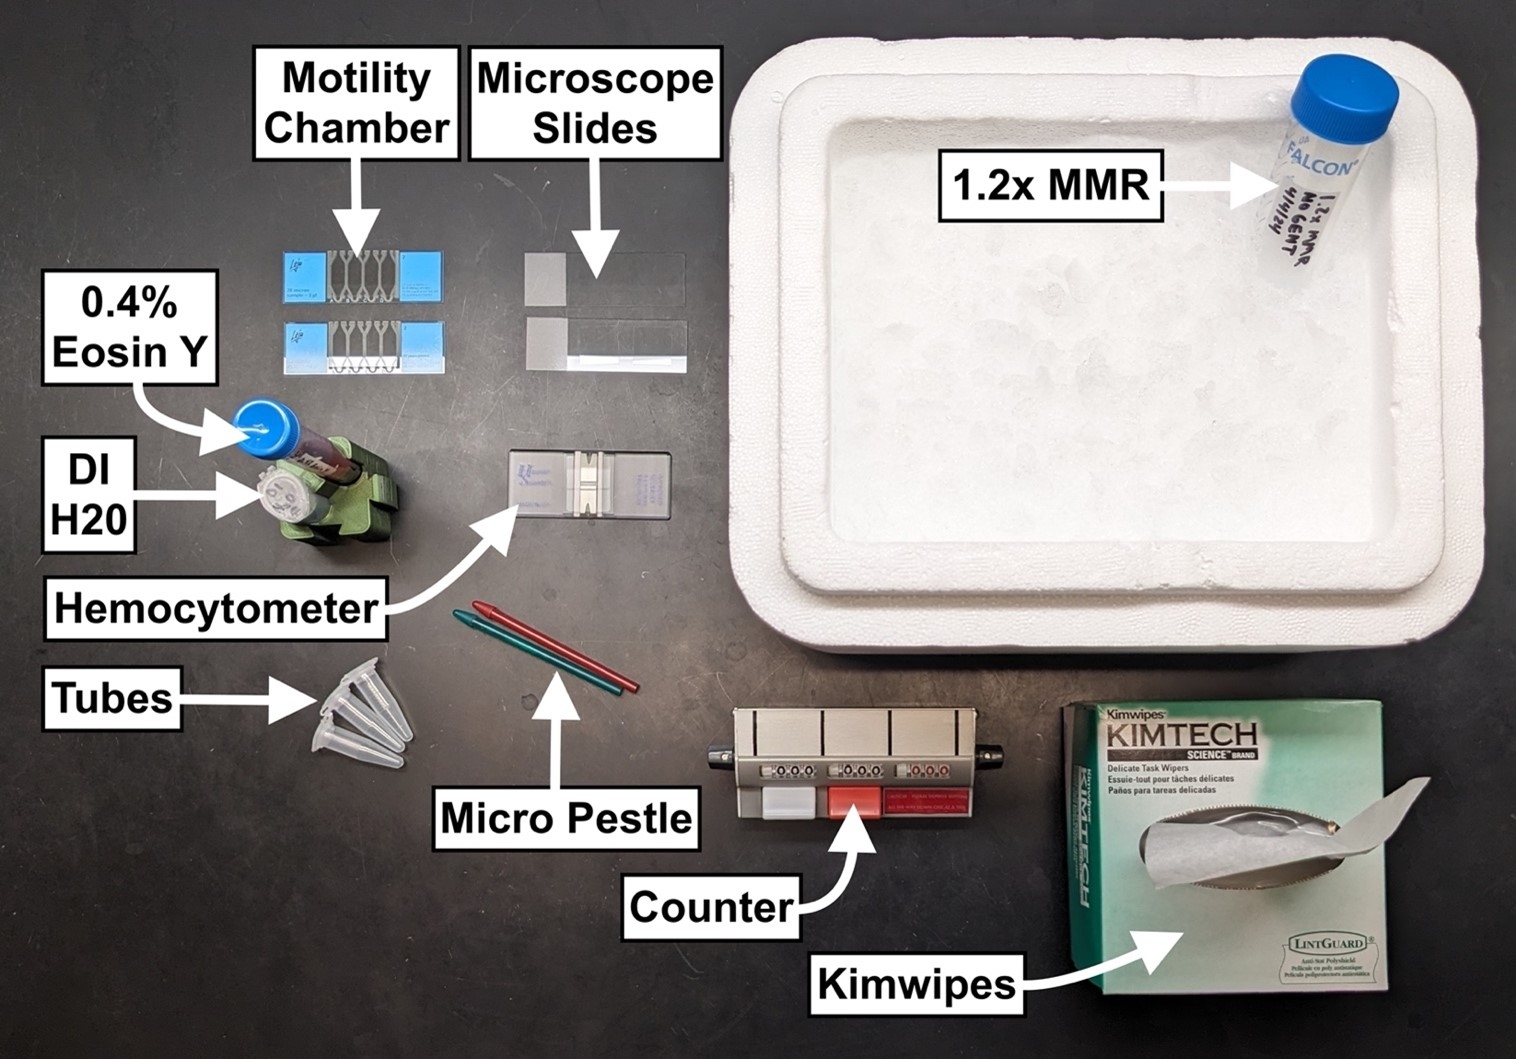
- Micro pestle
- 1.5mL conical bottom tubes
- 1.2x MMR
- Ice bucket
- Kimwipes
- Counter
- Hemocytometer
- 0.4% Eosin Y (in 1.2x MMR)
- Microscope slides with coverslips
- Computer-Assisted Sperm Analysis system
- Or camera compatible microscope
- Leja Slides – 20μm depth compatible with CASA software
- Microscope with up to 400x magnification.
- Such as Axiolab A5 with:
- Zeiss A-Plan 10x/0.25 Ph1 ∞/-
- Zeiss LD A-Plan 20x/0.35 Ph2
- Zeiss A-Plan 40x/0.65 Ph2
- Such as Axiolab A5 with:

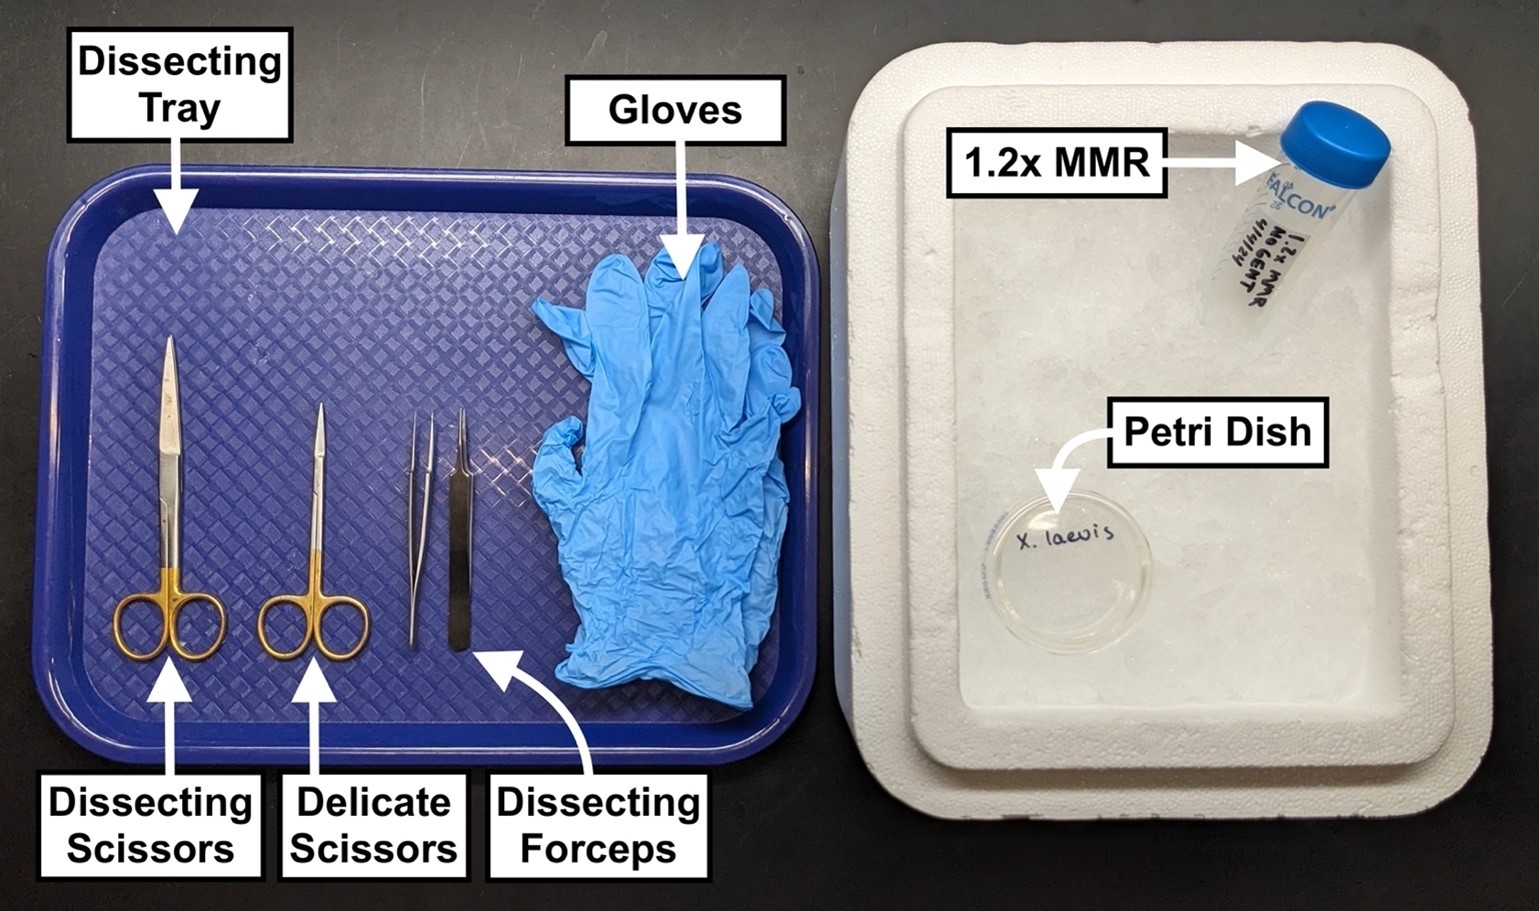
- Standard dissecting scissors
- Delicate dissecting scissors
- Dissecting forceps
- Dissection tray
- Ice bucket
- 1.2x MMR
- Small Petri dish
- Surgical gloves

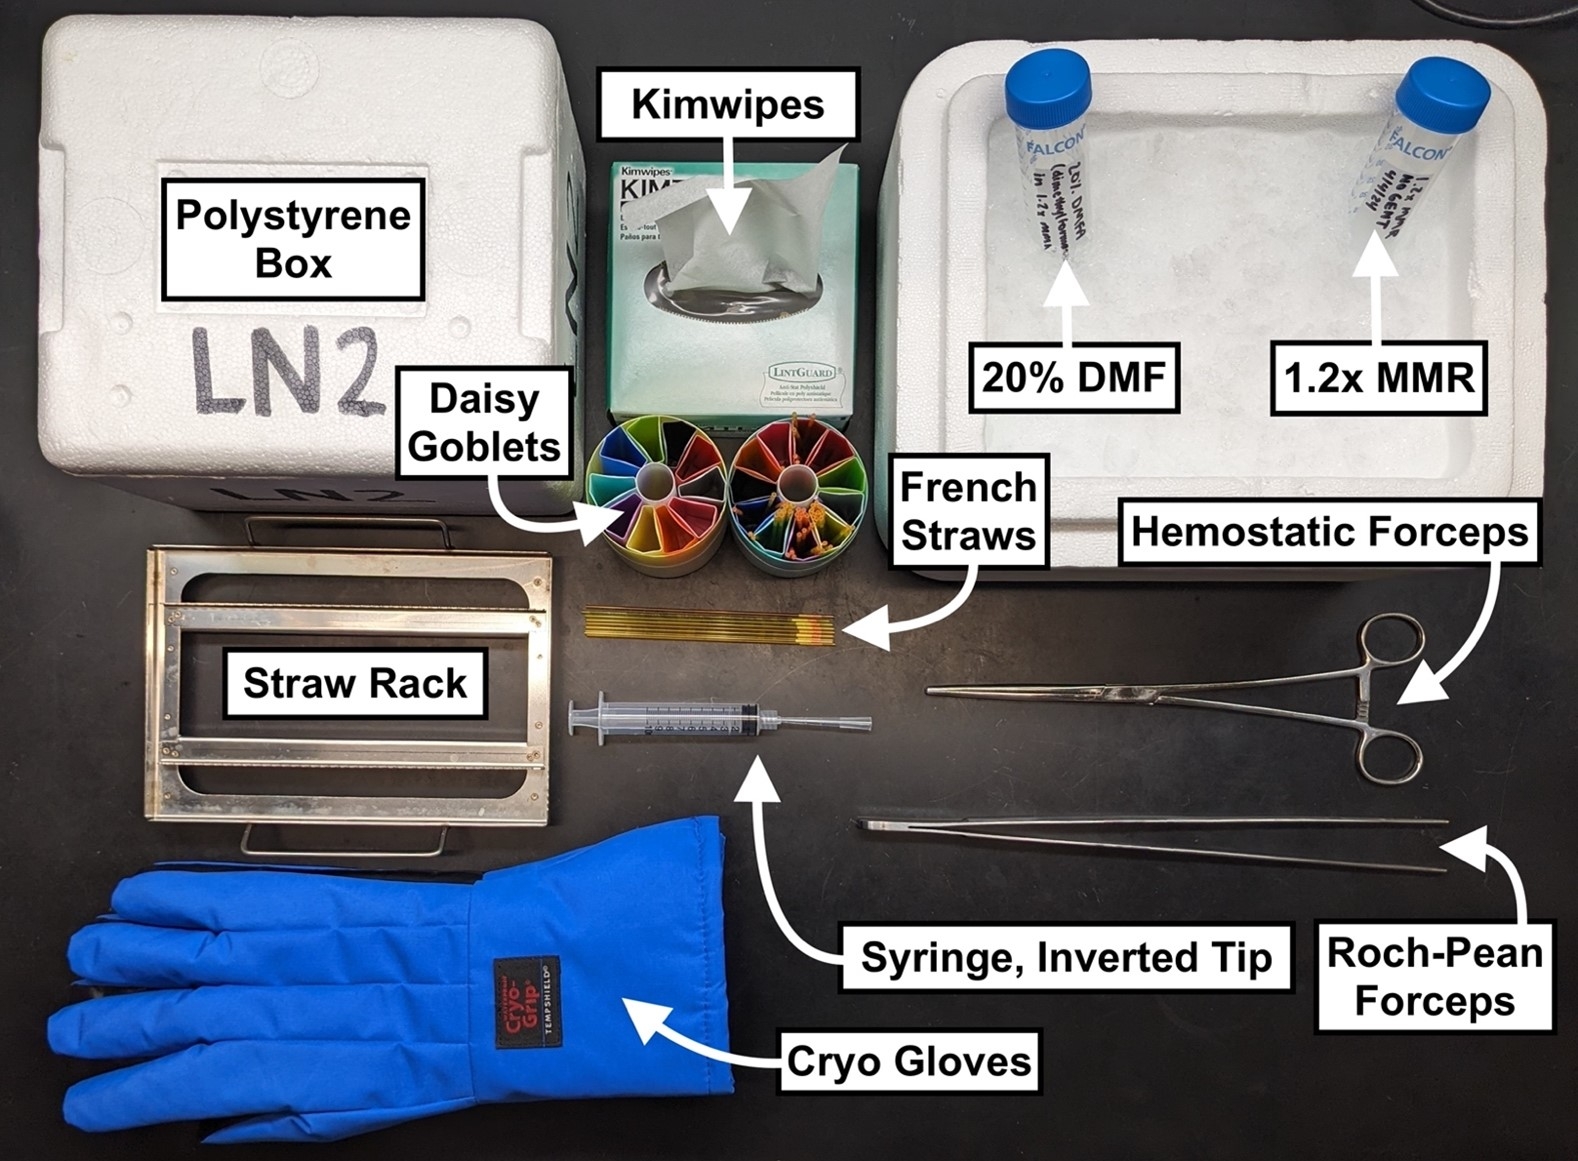
- 1.2x MMR
- 20% DMF (N,N-Dimethylformamide) in 1.2x MMR
- Ice bucket
- 0.25mL or 0.5mL French straws
- Polystyrene container
- Controlled-rate freezer, or PCPD
- LN2 tank
- French straw freezer rack
- Modified syringe
- Ultrasonic sealer (or PVA powder, heat sealing)
- Kimwipes
- Dewar with daisy goblets
- Roch-Pean forceps
- Hemostatic forceps
- Cryo gloves

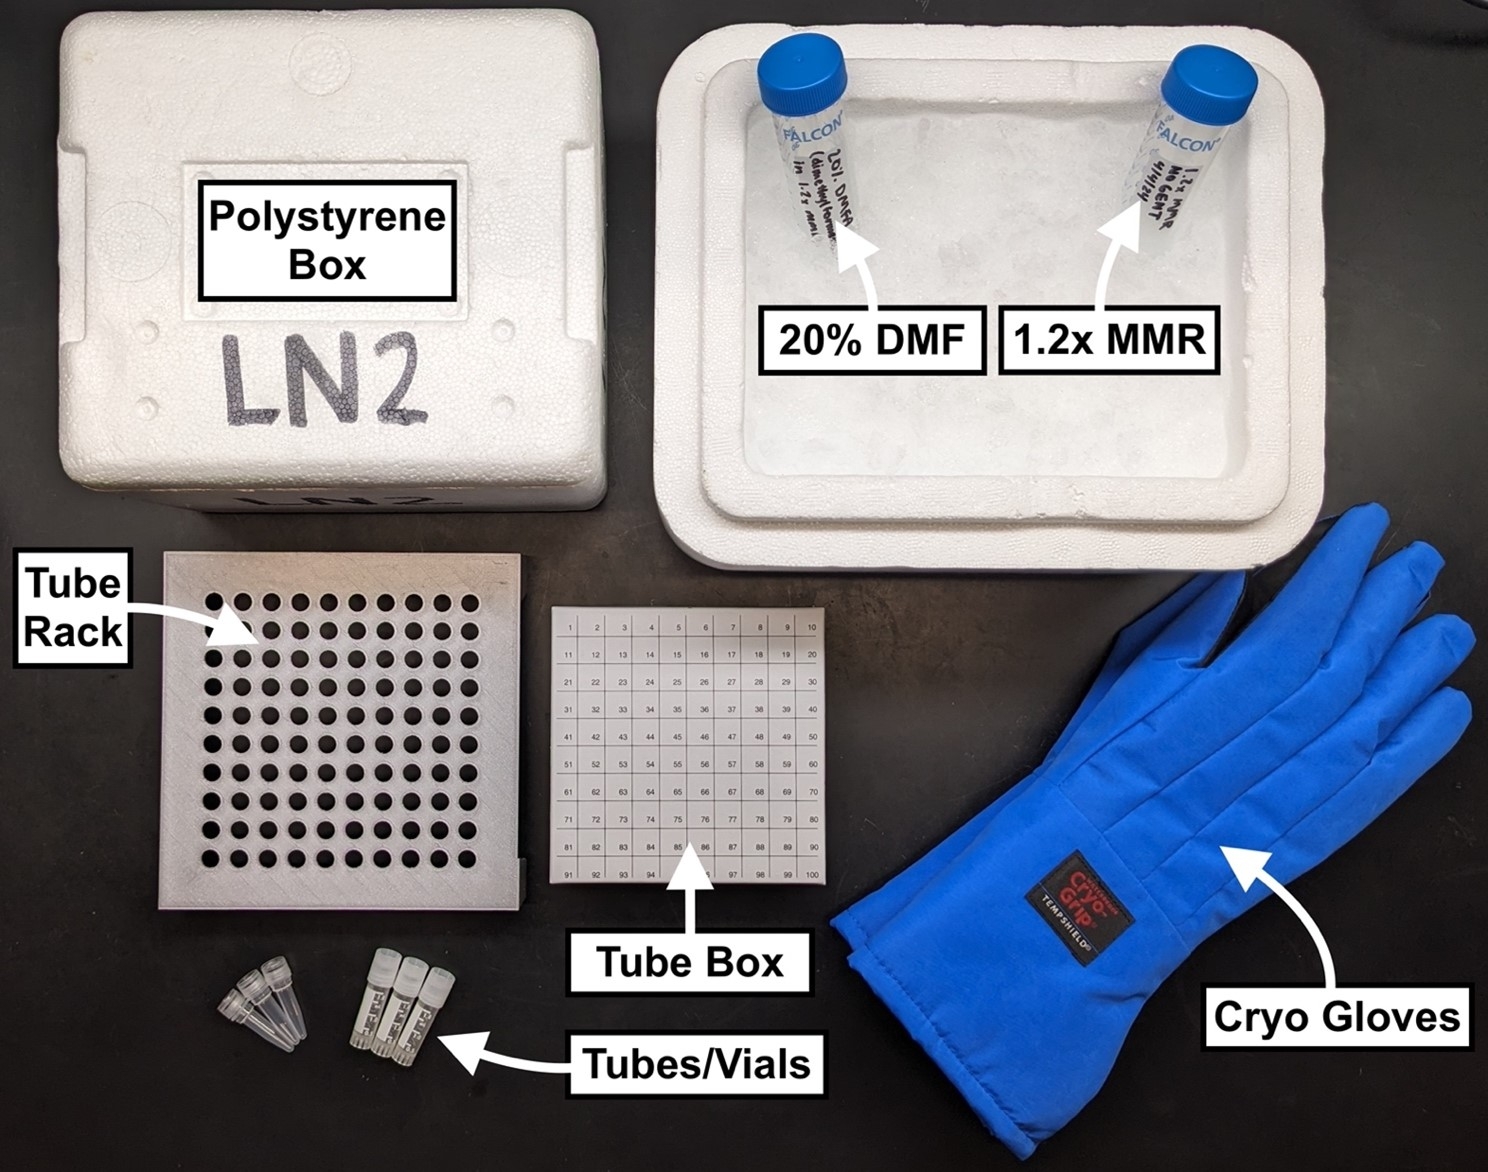
- 1.2x MMR
- 20% DMF (N,N-Dimethylformamide) in 1.2x MMR
- Ice bucket
- Tubes or vials
- Polystyrene container
- Controlled-rate freezer
- LN2 tank
- Tube rack
- Tube storage box
- Cryo gloves